First go to Bots section, select All bots subsection and proceed to Spot bots block.
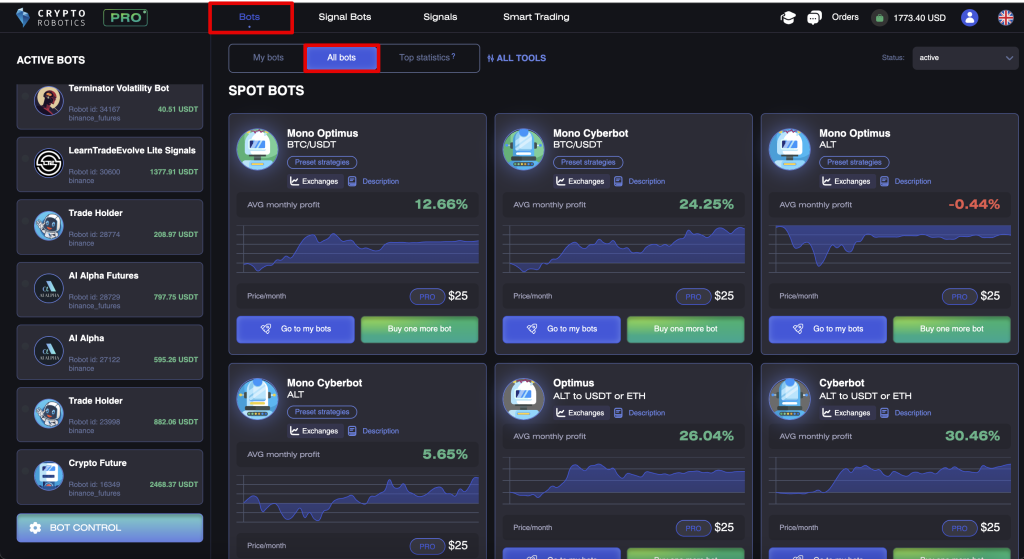
Here you can find Mono Optimus and Cyberbot trading bots that trade just one currency pair, and classic Optimus and Cyberbot that trade multiple currency pairs.
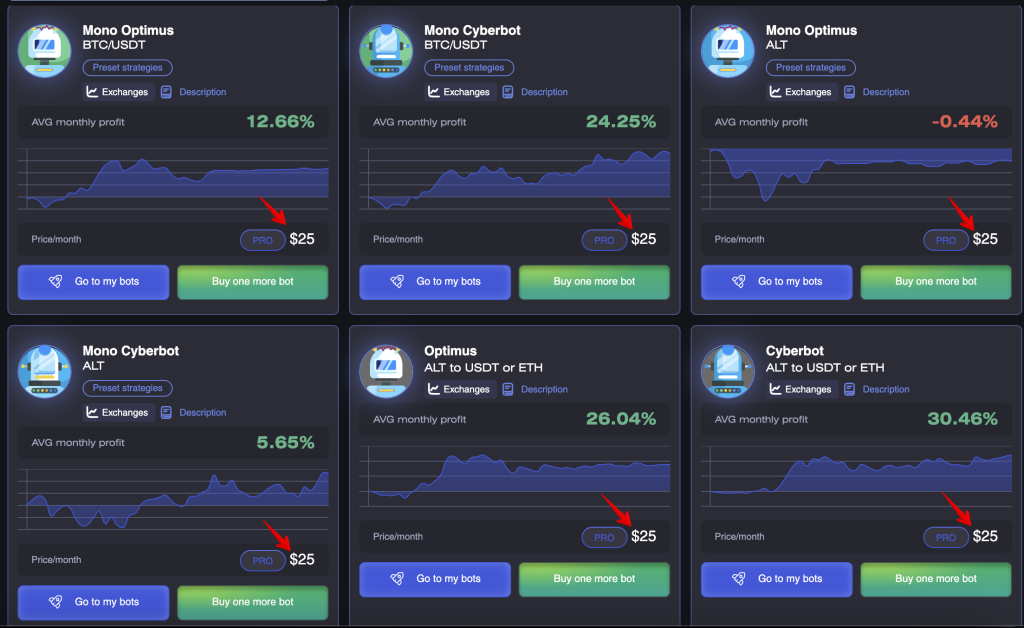
You do not need a PRO package to use these robots. Any of them can be connected either for a fixed subscription fee (from $25)
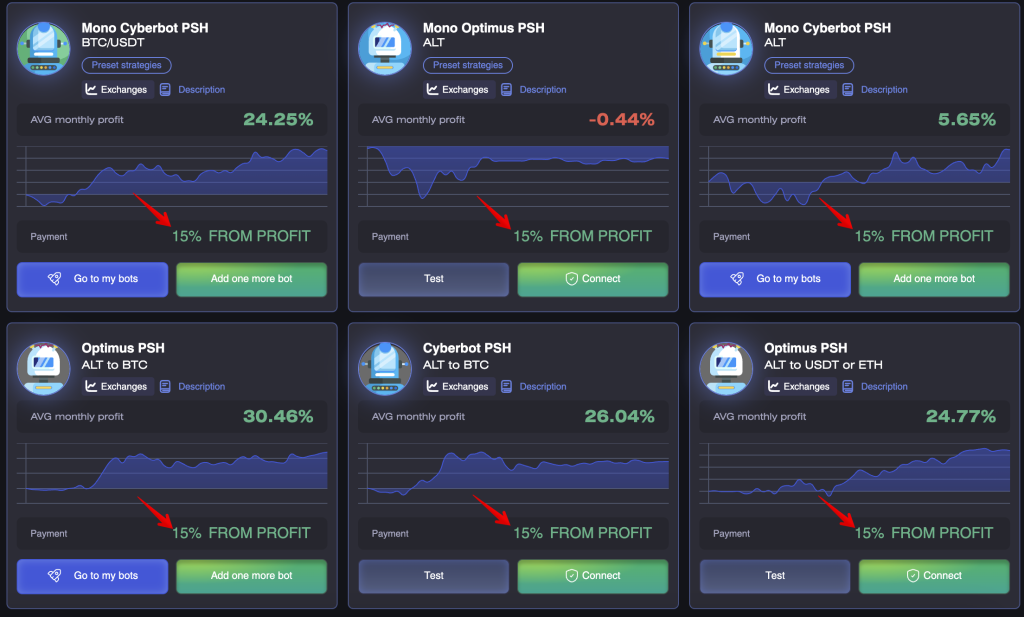
or via the Profit Sharing system — for 15% from profit.
In order to proceed to the settings and launch, you need to click on the Connect button in the All bots section

or click Go to my bots, if you have purchased a bot on the subscription basis.

Click Statistics to see the information about the bot.
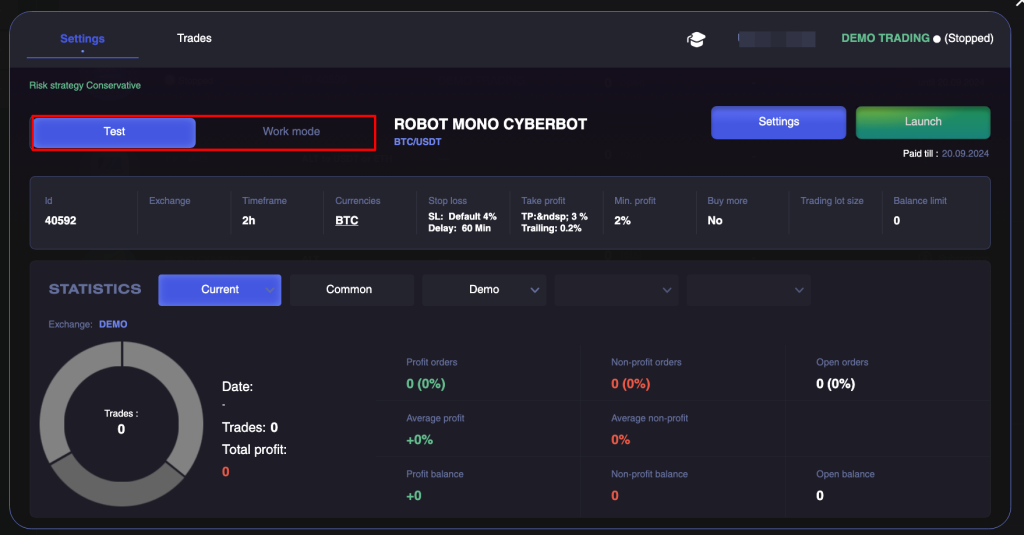
Before proceeding to the settings, let’s first see all the fields in the main menu — Information about the bot.

These fields display your settings in the bot and the status of its work.
Below are the trading statistics for the selected period.

- Current — displays all statistics since the last launch of the robot;
- Total — shows the overall statistics of the robot’s trading for all periods of work;
- Past — here you can select statistics for a specific period (date);
You can also filter statistics on a specific exchange and a trading pair (BTC, ETH, USDT).
Below is the dashboard statistics for all transactions. It shows the number of successful and unsuccessful transactions, calculates the average profit or loss on a single trade (average). It also shows how many open transactions are there.
In the left corner is the total profit for all closed trades.
To go to the settings of the bot you need to click on the Settings button in the upper right corner.

At the top right corner exists two trading modes: Test and Work mode.
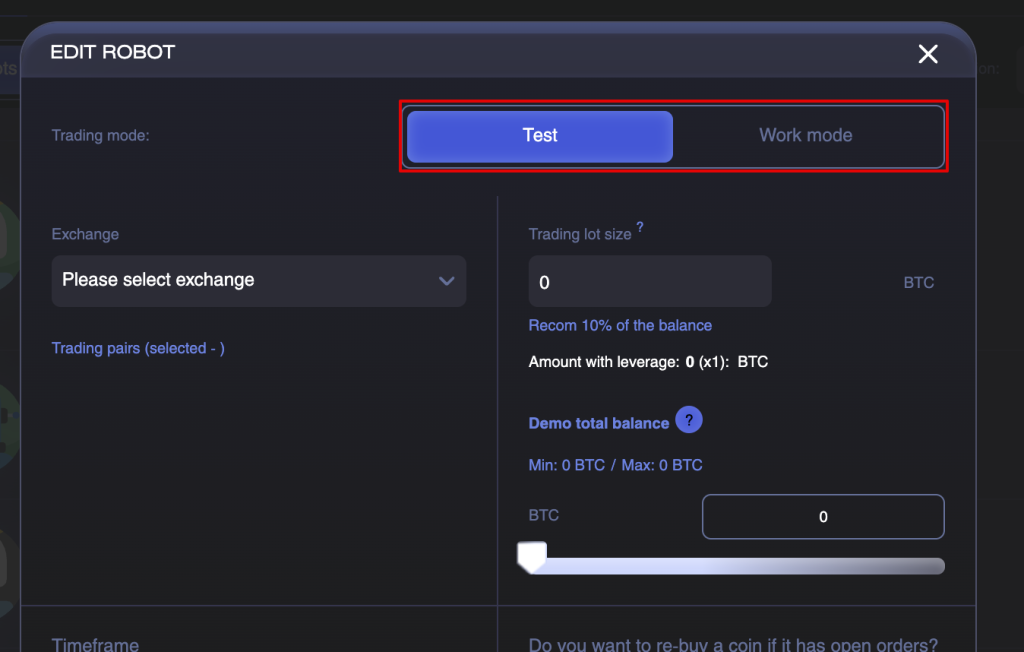
The Test mode shows the real trading in real time, not taking into account only the volumes in the order books. The signals at the entry and exit points are the same as in the trading mode.
This mode is developed for testing various strategies and settings.
The bots are available for test on any of the packages, including the FREE one
Test period lasts 14 days from the moment the bot is added to the My bots section.
If the bot was added to the system by you more than 14 days ago or was already included in the paid package, it will not be available for test on a FREE package.
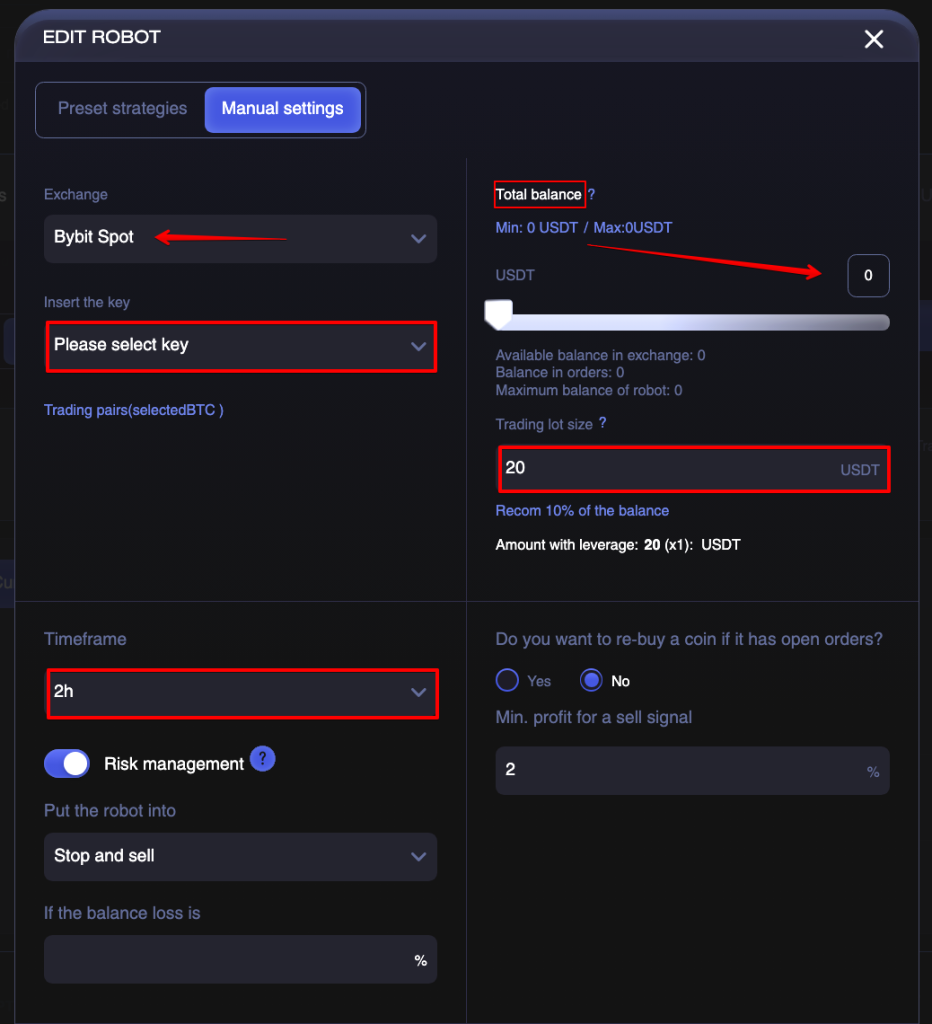
- Exchange — choose the exchange for trading (Binance, Bybit, Okx …);
- Insert the key — you can choose an API key bots will trade from;
- Main coin — choose the currency to which you will trade (BTC, ETH, USDT);
- Trading pairs — tick the currency pairs you want to trade;
- Timeframe — select the interval of one candle (1h, 2h, 4h, 1d);
- Total balance — the total amount of trade you allocate for the bot;
- Trading lot size — set the amount per transaction (we recommend setting at least 0.0025 btc or $15 equivalently);
Buy the same coin
The next parameter that we added is the repeated purchase of the same currency, even if there are already open orders for it. This feature will help increase the number of orders opened by the bot.

When there is an entry signal the robot will open an order even if there are existing orders for this currency pair. Thus, you will not miss additional entry signals if there is a sustainable growth of the coin. This is especially important when you are trading in one pair (for example, BTC-USDT).
If you disable this parameter, the robot will not enter into trades when there is an entry signal if there is already one open order for this trading pair.
Configurations for exiting a trade
To ensure that these settings are easy to set up and understand even for inexperienced users we added preset settings that will simplify interaction with the robot.
These settings will be set by default when you first open the bot.
You can change them by clicking on the Extended button, and the full range of bot settings will be available to you.
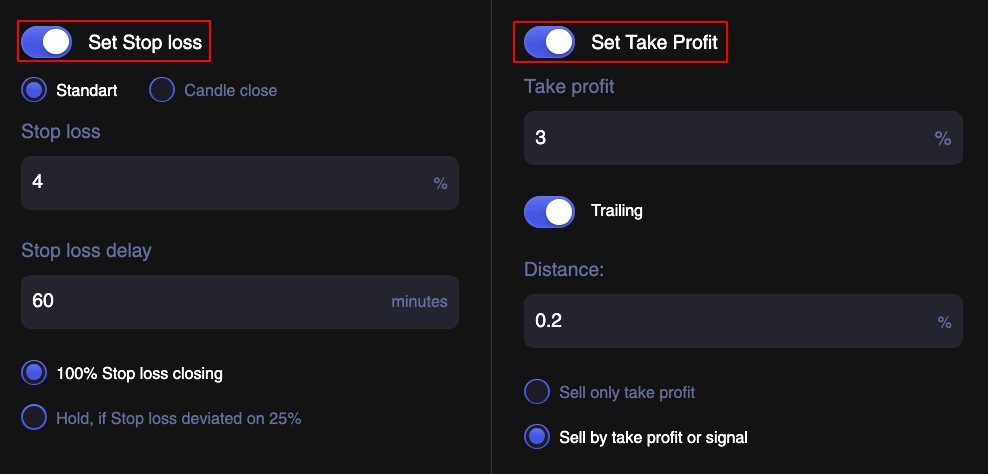
Let’s look at the settings of exit points from the trade on each of the options.
Extended settings
Let’s start with advanced settings and then move to what is included in the basic configuration.
There are 3 configurations at the exit of the trade — Stop loss, according to the algorithm and Take profit. You can use them both together and separately.
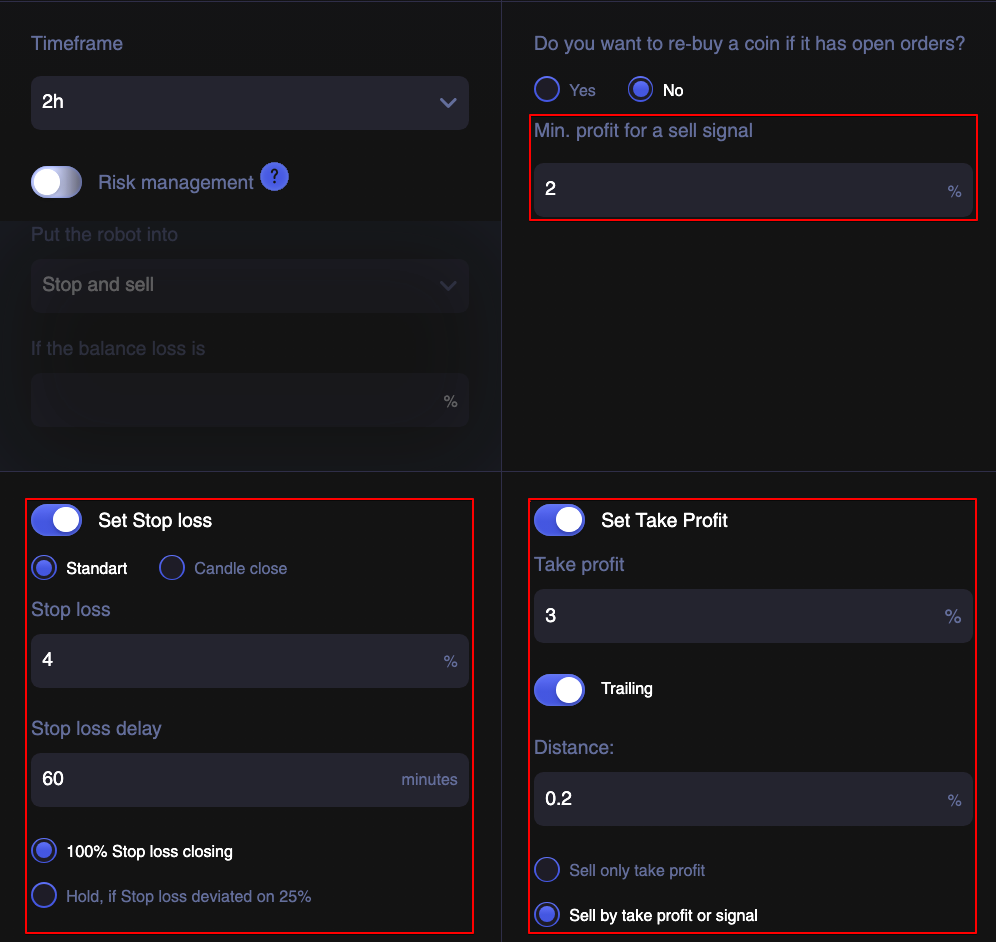
Let’s look at each of the parameters, and then see how these configurations work together.
Minimum profit for exit signal
The first parameter that forces the exit signal is based on an algorithm developed by our team. It simplifies the work with the robot for inexperienced users. In the basic configuration, it is pre-set as 3% and cannot be changed. In advanced settings, you can adjust it in the limit of 5%.

The algorithm allows to stay in a trade and track changes in indicators that give a signal to exit. If the currency price on which the robot opened the trade grows the robot does not sell this coin. When there is a signal for a trend change the robot closes the order for this trading pair.
Previously, the robot was looking for exiting the trade to achieve a minimum of 1% profit and thus the average profit per trade was within 1.5-2%. Now the user can set this parameter by himself within 5% (you can specify both integers 5% and fractional 2.5%). Thus, if you bet 3% the robot will search for exit points according to the algorithm only when it reaches a minimum of 3% profit.
Close by Take Profit
For those users who want to set their Take profit we have implemented an additional block of settings.
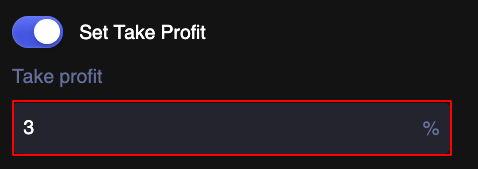
To set Take profit you need to enable this option and set the necessary settings. In the Take profit field set your value in % and when this value is reached the bot will close the order in profit.
Trailing for Take profit
If you want to use the Trailing function for Take profit enable it by checking the box and the distance in %.
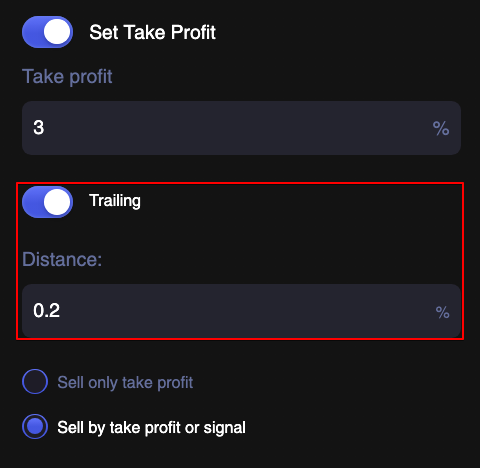
Let’s take a look at how Trailing works.
When the specified Take Profit is reached and if the price continues to increase Take Profit moves up with the deviation that you have indicated. Say, you specify a distance of 1%.
As the price rises Trailing moves your Take Profit level higher. As soon as the price began to decrease and reached a deviation of 1% of the maximum price the order will be closed. If the price has deviated by only 0.9% of the maximum value (not reaching your value of 1%) and then began to grow Take profit continues to move up.
Choosing an exit condition
In Take profit settings you have 2 options as well.
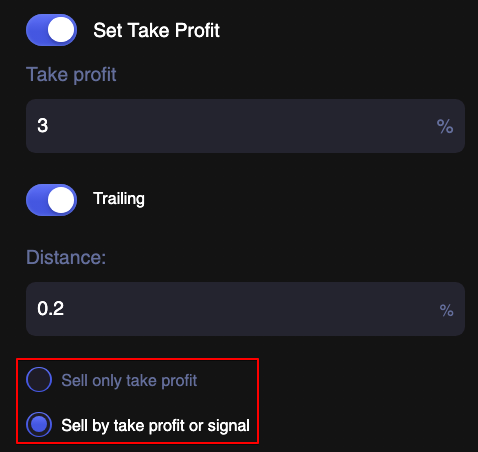
- Closing only by Take profit — this option will take into account only the values set in this block. Min. profit for exit signal (exit by the algorithm) is not taken into account.
- Closing by Take profit or Signal — if you select this setting, the bot will search for an exit point from the trade in both configurations and close the order on the first incoming signal.
Stop Loss delay
Let’s move to Exit by Stop Loss. In order to use Stop Loss in your trading you need to enable it and set up the settings.
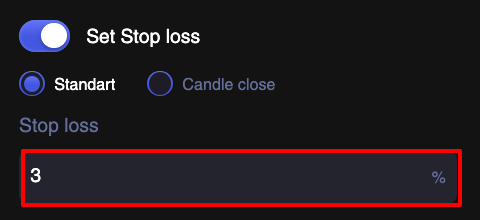
Stop loss works on the same principle as before. When reaching a loss on a trade with a specified value (for example, 3%), the bot closes the order by the closest values in the order book.
The only thing that has changed is that we added the ability to delay Stop Loss in minutes. The preset delay settings are 0 minutes.
How to use stop loss delay?
Let’s take an example: you trade with Stop loss at 3% and a delay of 60 minutes. With this setting, the bot will postpone the exit after reaching Stop loss for 60 minutes and will return to checking its value after the time you have specified. We advise to use this parameter only for experienced users.
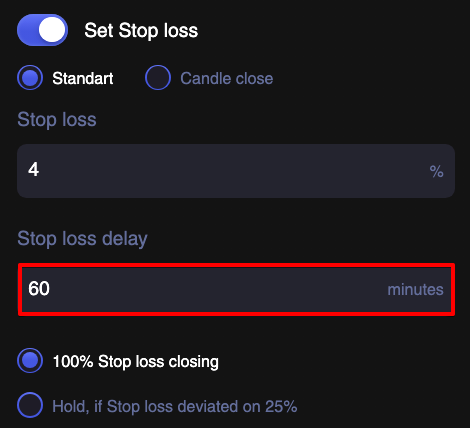
For experienced traders only:
Stop loss is also available for users with «Candle close» option. This type of Stop loss checks not the current price but checks the price at which the candle has closed for the previous period for the selected timeframe (1h, 2h, 4h, 12h, 1d).
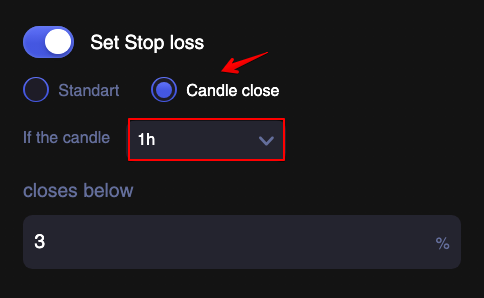
The preset indicator checks if the previous candle for 1h, 2h, 4h, 12h or 1d closed at a price lower than that indicated in the % to buy price.
Thus, the trader protects the deal from possible price fluctuations within the timeframe, increasing the chances to exit in Take Profit.
Basic settings
In the basic settings you can change Stop loss and buy the same coins again. The pre-set exit points to profit (with a minimum profit of 3%) by default will give a signal to the bot to sell. This will simplify the trade for inexperienced users due to the minimum selection of parameters and automation of our algorithm.
Applying the updated settings
After you click on Change settings button the window pops up on what orders to apply these settings.
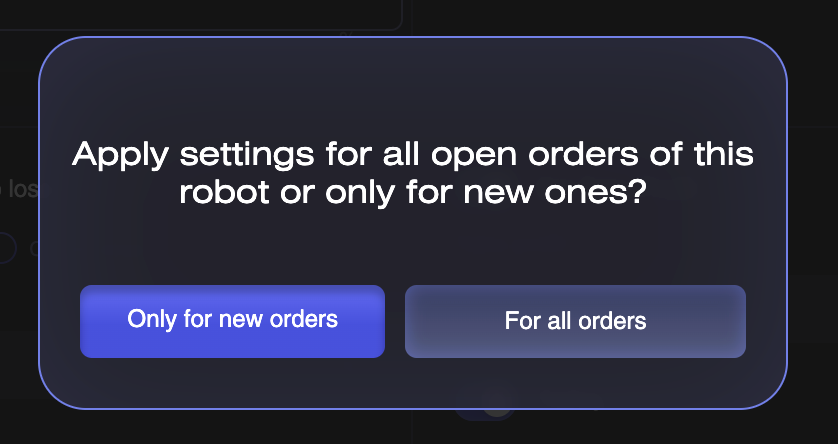
- Edit only bot config — this means that the current open orders will continue to be executed according to the old settings and new orders that the robot will open after saving this parameter will be executed according to the new settings.
- Edit also bot’s open orders — this means that you apply new settings not only to new orders, but also to all already opened orders of the robot.
If you have no open orders in the robot this option won’t be displayed. Settings are applied to all future open orders automatically after clicking on the button — Change Settings.
Editing open order settings
We added the ability to change the settings for each open order.
Now you can change the settings for Stop loss, Take profit, Trailing and exit signal for each open order of the bot during trading.
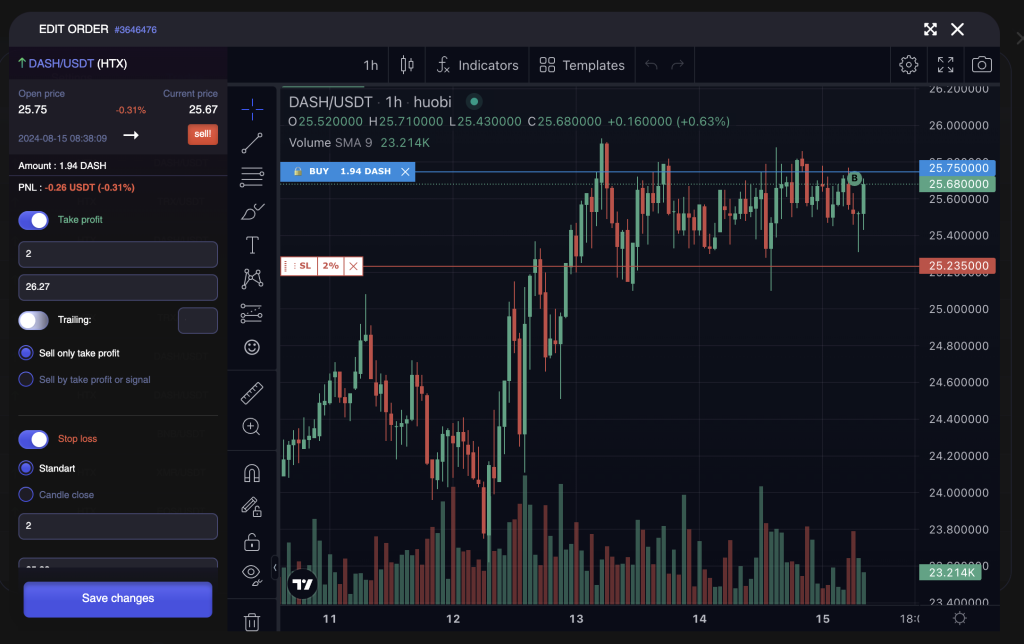
This will help you more flexibly manage robot orders if you need.
To stop the bot, click the Stop button. You have three options available: Stop, Stop buy and Stop and sell.
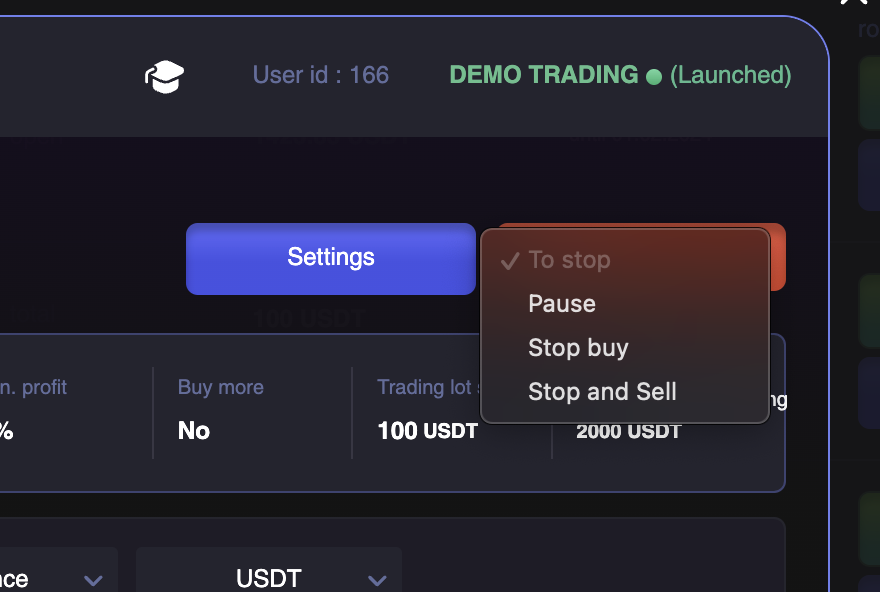
- Pause — the bot stops any activity;
- Stop buy — the bot will stop looking for new entry points, but will continue to look for a way out for already opened orders;
- Stop and sell — all the opened orders will be executed in the coin to which they were opened by the bot (BTC, ETH or USDT). The robot will be stopped.
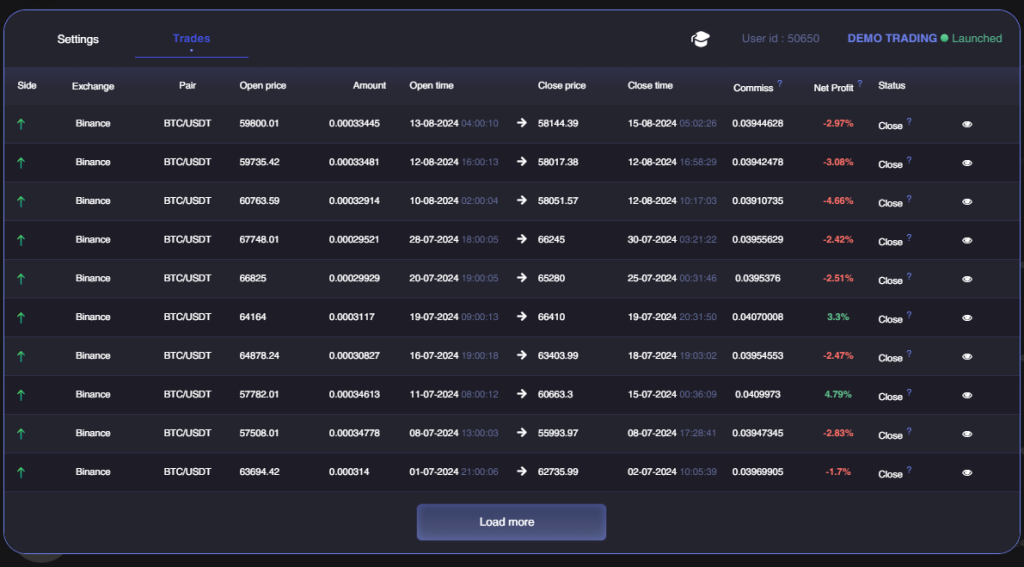
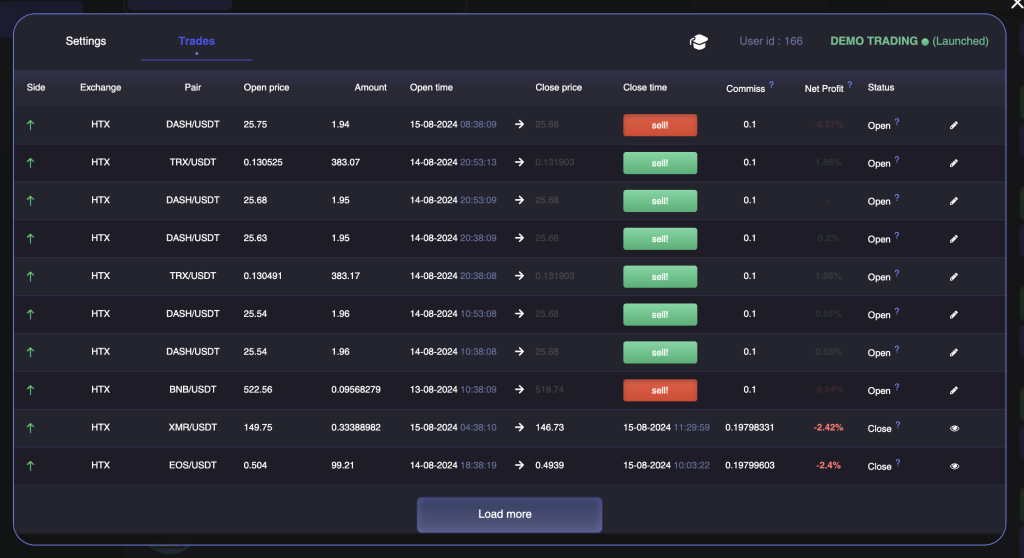
Let’s now go to the Trades tab and see the information about these trades.
Here you will find information on each order: exchange, currency pair, purchase price, purchase time, sale price, sale time and profit. And it is also possible to delete or edit each order.
If the trades is not closed the profit is shown in real time. A white arrow indicates open trades, a red arrow indicates positions closed at loss and a green arrow indicates trades with a positive profit.
Also, in front of each open trade there is a button “SELL”. At any time you can close your position manually. Also, each open trade can be removed from the statistics of the bot by clicking on the cross.
