If you have your own strategy in any system, for example, on TradingView, you can automate it on the CryptoRobotics platform in just a few steps by creating a trading bot in our system.
After the test period (30 days) expires, you can not only use the strategy for yourself, but also monetize it by selling it to other users.
To do this, you need to go to the Algotrading -> Trading Robots section and click on the Add strategy button in the upper right corner of the terminal.

The robot settings are controlled from several blocks. You can set the main parameters in blocks:
- Basic settings. Here you can set the basic parameters for your robot (title, avatar, exchanges and main coins);
- Sending signals. This block is designed to select the parameters that will come in the signals and generate a request based on these parameters.
Additional parameters are presented in blocks:
- Advanced strategy settings. This block is designed to include advanced optional settings in the strategy, such as limits on balance, lot amount, TP, SL, etc.
- Display options for users. In this section, you can select the parameters that will be available for editing by the user when setting up the robot.
- Description and disclaimer. Here you can save a short description and disclaimer for the robot based on your strategy.
- Pricing. This block is required so that you can set a price for your robot.
The first step is to set the Basic settings.
To do this, please specify:
- the title of the robot;
- exchange/s from the list of available ones;
- main coin for trading — only coins that are traded on each of the selected exchanges are available for a choice. You can select one or more. The maximum number of selected coins is 3.
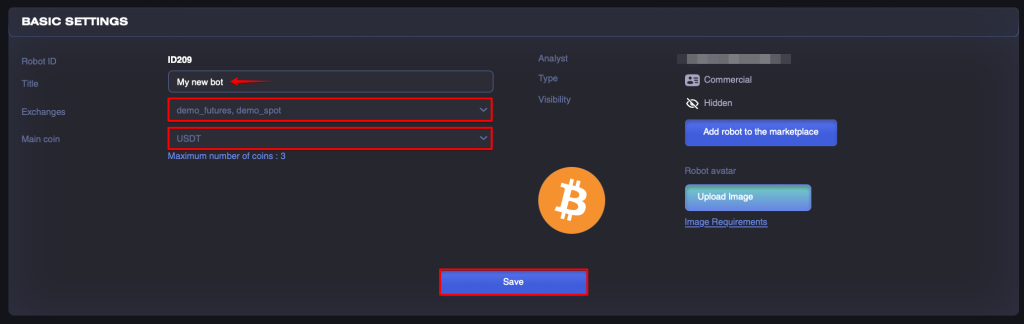
Then click Save button to save the settings.
Next, you need to upload the Robot avatar (the parameter is not required before the robot is published on the marketplace).
The image must meet the following requirements (you can also view the requirements by clicking the Image Requirements button):
- PNG, JPG format;
- resolution 200*200px;
- maximum size 150 kb;
- square image without rounded edges and transparency, the image will be automatically rounded on the interface.
Having selected the desired image that meets all the requirements, you need to click on the Upload image button on the right side of the screen and select the image file on your computer.
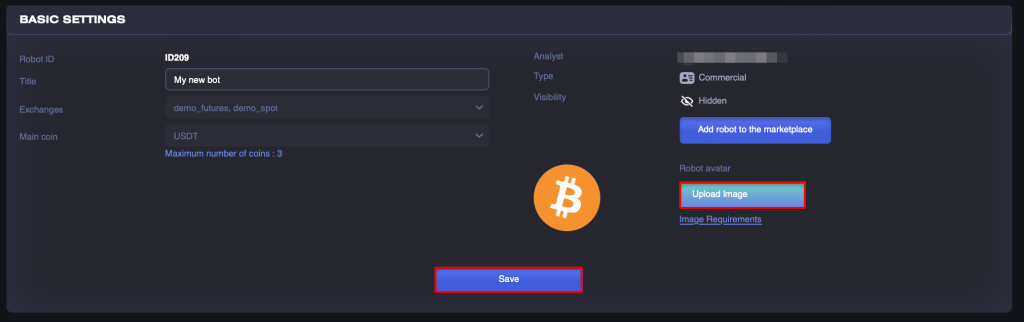
After that, click on the Save button again to save the specified settings in the system.
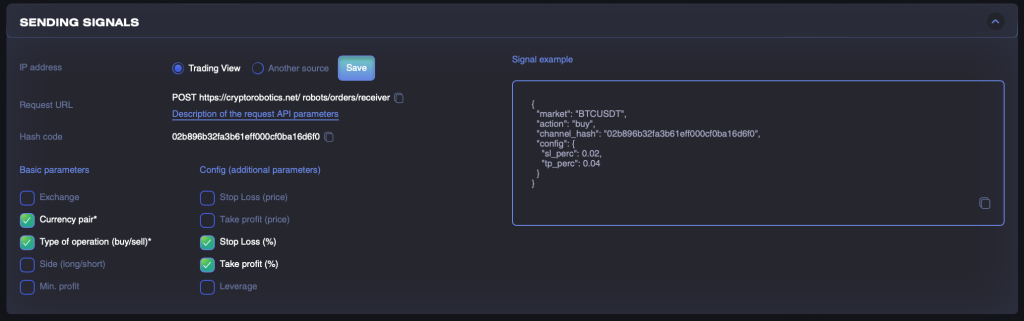
First of all, you need to select a signal source. If you want to send signals not from TradingView, but from another external system, you will need to specify one or several IP addresses that you will use to send signals.

Next, in the Request URL block, you can get an address which you can use to send requests. You can easily copy this address by clicking on the copy icon, and also study the description of the request API parameters at the corresponding link under the request address.
Below you will see the hash code of your robot, which is also available for copying.
Next, you will need to select basic and additional parameters that you will send in signals.
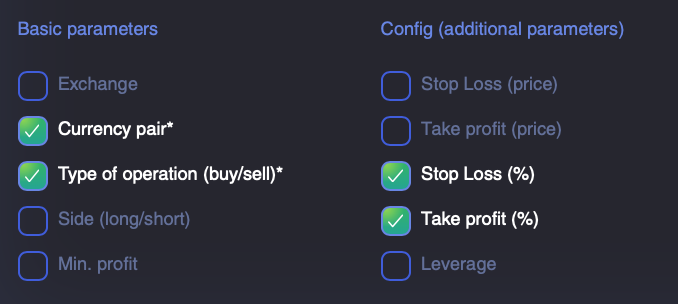
The basic ones include:
- exchange — the name of the exchange;
- currency pair which is traded;
- type of operation (buy/sell) — a signal to open or close. Values: «buy» — to buy, «sell» — to sell (for spot exchanges) or the values »open» — opening and «close» — closing (for futures exchanges);
- side (long/short) — direction of the order. Use this option for futures exchanges. If the parameter is not passed, then it is perceived by default as a long for futures exchanges, and if these are spot exchanges, then as a normal one.
Required parameters are marked with an asterisk (*).
Config (additional parameters):
- stop loss;
- take profit;
- min. profit (this is the value of the minimum signal profit at which the robot will close the trade);
- leverage (only for futures exchanges).
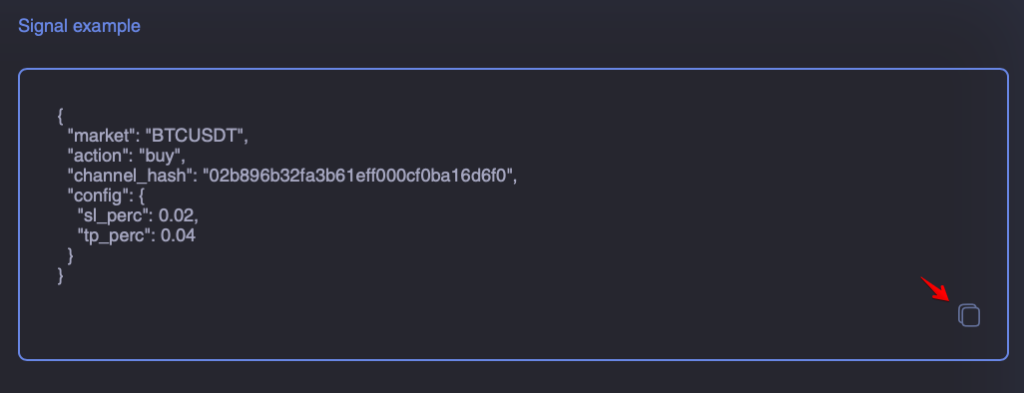
After you specify all the necessary parameters in this block and click Save, a ready-made signal example which you can copy in one click and use for sending will be generated for you on the right side of the block.
After you have filled in all the settings in the main blocks, if necessary, you can go to the additional, optional ones.
Go to the Advanced strategy settings block.
This block is designed to include advanced, optional settings in the strategy, such as limits on balance, trade amount, TP/SL, etc. You can expand it by clicking on the arrow on the right side of the block.
ATTENTION! These parameters should be filled in if you do not fix them in requests. Otherwise, requests will take precedence over these settings. Duplication of information in this block is not required.
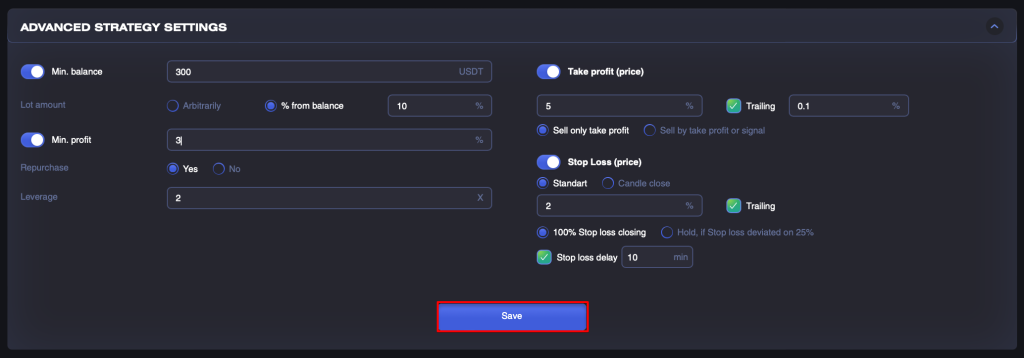
- Min. balance and lot amount. You can set a minimum balance limit for users to use your robot, as well as limit the size of the trade to a certain percentage of the trading balance, or leave the transaction amount arbitrary.
- Min. profit and repurchase. By activating this setting, you can specify the minimum percentage of profit for an exit signal, as well as activate the repeated purchase of the same coin, which means that the robot will open new orders even if there are existing orders for this currency pair.
- Leverage. This parameter sets the maximum allowable leverage for the user. This means that the user will not be able to trade with leverage greater than what you specify in this field.
- Take Profit and Trailing for Take Profit. In the Take Profit field, you can set your own value in %, and upon reaching this value, the robot will close the deal in plus. If you want to use the trailing function for the take profit value, then activate it by checking the box and the distance in%. When the take profit value you specified is reached, if the price continues to increase, then the value moves up with the deviation you specified.
There are two configurations for closing a trade as part of the use of take profit:
- Sell only by take profit. This configuration will only take into account the values set in this block. Min. profit configuration is not taken into account.
- Sell by take profit or signal. If you select this setting, the robot will look for an exit point for both configurations and close the order on the first signal received.
- Stop Loss and Trailing for Stop Loss. You can choose from two types of stop loss trades:
- Standard. When a loss is reached on a trade with a given value (for example, 10%), the robot will close the order at the nearest values in the order book.
- Candle close. This type of stop loss differs in that the check is carried out not at the current price, but at the price at which the candle closed for the previous period on the selected timeframe (1h, 2h, 4h, 12h, 1d).
- The trailing stop loss function automatically moves the stop loss level up. To start using it, you need to specify the distance as a percentage. If the value of the asset starts to decline, the trade will automatically close at the price level where the trailing moved it.
As part of the stop loss configuration, you also have two additional settings for the signal to exit the trade:
- 100% stop loss closing.
- Hold if the stop loss deviated by 25%. If this option is selected, then if the stop loss deviates by 25% from the specified stop loss value, the robot will transfer the asset on which this trade was opened to hold.
You can also activate the Stop Loss delay parameter by checking the checkbox opposite it and entering a value in minutes to the appropriate field. So, for example, if you specify a stop loss of 10% and a delay of 10 minutes, the robot will delay the exit on reaching the stop loss by 10 minutes and return to checking its value after the elapsed time that you set.
After you have set all the settings you need, you need to click on the Save button.

The following parameters are open for users by default:
- exchange;
- API key;
- balance limit;
- trading lot amount;
- leverage (for futures).
We do not recommend providing users the choice between multiple configurations of settings, as the ability to edit the included parameters may change your trading strategy and its potential profitability.
After you mark the required parameters to be displayed on the user interface, please use the Save button.
When forming the final settings from the Sending signals, Advanced strategy settings and Display settings for users blocks, settings will be selected that fix the minimum risk: for example, the minimum leverage or stop loss.
For example, the user specified the X10 leverage, in the request you send the X3 leverage, in the Advanced settings — X5. X3 leverage will be taken into trading as the minimal one.
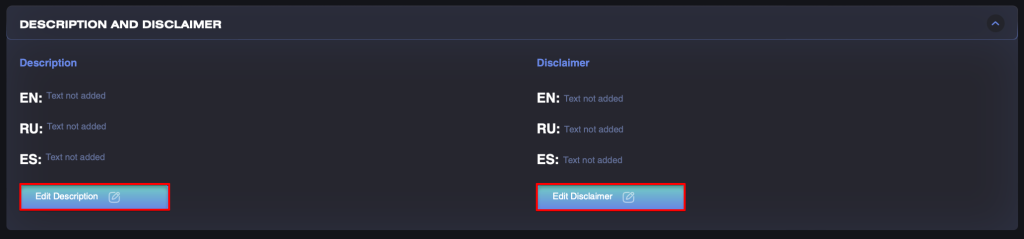
To do this, click on the Edit Description or Edit Disclaimer button and enter your text in the text editor field for each language.

After you fill in all the fields with a description, you will need to click on the Save button.
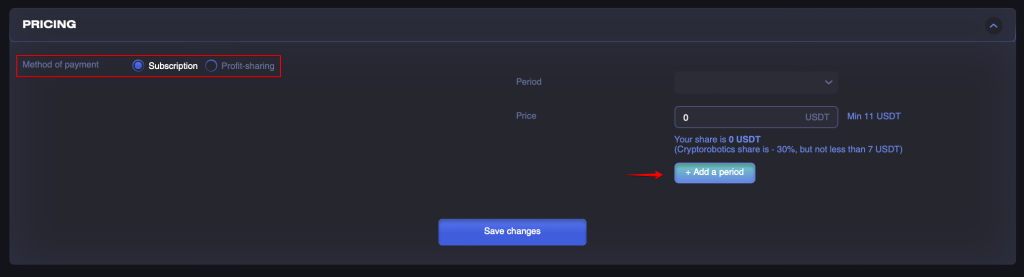
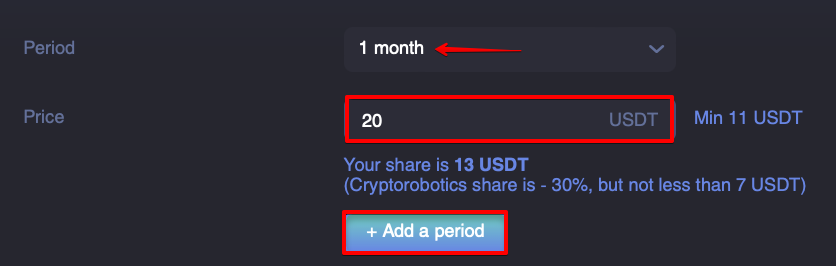
Then you can choose a period from those available on the platform (1, 3, 6, 12 months) and set your price for the selected period.
Please note that the Cryptorobotics share is 30% of your price, but cannot be less than $7. Based on the value you set, you will see your share in dollar terms under the price field.
You can use the +Add a period button to set a price for other available periods, or click the Save changes button at the bottom of the block.
In case you want to receive a percentage of your subscribers’ profits, you need to choose the Profit Sharing payment method. After that, you will see a block with advanced options.
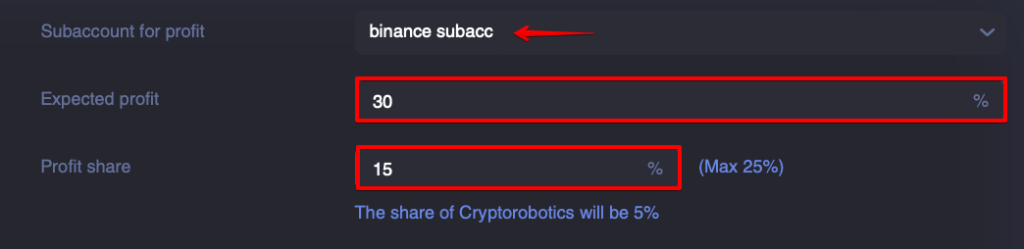
Select your subaccount for profit accrual. If you do not have a subaccount on our platform, please follow the manual to create one.
Specify the expected monthly profit of your robot in % and your share in the profit (the maximum size of your share is <25%). The share of Cryptorobotics will be 10%.
After that, you can click on the Save Changes button at the bottom of the block.
In order to release your robot on the CryptoRobotics marketplace and monetize your strategy, you need to get moderated.
Please note that the creation of custom robots is only available with the PRO package:
Basic PRO — 1 custom robot;
Profit PRO — 2 custom robots;
Expert PRO — 5 custom robots.